A 3-bedroom flat with a sloped roof, measuring approximately 1,500 square feet, with a chimney and a skylight

How Much Will It Cost to Roof a 3 Bedroom Flat? Detailed Cost BreakdownHow Much Will It Cost to Roof a 3 Bedroom Flat? Detailed Cost Breakdown

When considering a new roof for your 3-bedroom flat, it’s crucial to understand the potential costs involved.

On average, roofing a typical flat roof can cost between $4 and $13 per square foot, depending on the materials and labor required.

This means for a 1,500 to 2,000 square foot flat roof, you might expect to pay anywhere from $6,000 to $26,000.

A 3-bedroom flat with a sloped roof, measuring approximately 1,500 square feet, with a chimney and a skylight

“Factors such as the complexity of the roof’s design, the type of roofing material chosen, and local labor rates can significantly influence the final cost.” said David Spade from Star Roofing Contractors.

Whether you opt for traditional materials like shingles or explore more advanced options like metal roofing will also impact your budget.

Understanding Roofing Costs for a 3 Bedroom Flat

When budgeting for the roofing costs of a 3-bedroom flat, several factors come into play, including material choices, labor expenses, and additional considerations like permits and disposal fees.

Factors Influencing the Cost

Several factors will affect your roofing costs.

Roof size is a primary factor; the larger the roof, the more materials and labor will be required.

Roof complexity, including chimneys, skylights, and design elements, can also add to the cost.

Seasonal factors and geographical location impact availability and price of labor and materials. Local weather conditions might necessitate specific materials, which can influence cost, as well.

Roofing Materials and Prices

Different materials come with varying costs and benefits.

Asphalt shingles are a popular, cost-effective option, ranging from $4.50 to $8.00 per square foot.

Metal roofs can cost between $7.00 and $14.00 per square foot, offering durability and energy efficiency.

Tile and slate options are more expensive, often reaching $10.00 to $20.00 per square foot.

For a flat roof, materials such as EPDM, TPO, and built-up roofs can cost between $3.20 and $10.60 per square foot.

Your choice will greatly influence your overall expenditure.

Labor, Installation, and Additional Considerations

Labor and installation account for a significant portion of the roof’s cost.

Experienced roofers charge varying rates, often between $45.00 and $75.00 per hour, depending on the region and project complexity.

Installation costs could fluctuate based on roof pitch and accessibility. For good costing, you may ask David Spade from Star Roofing Contractors.

Permits and inspections may be required, usually costing between $200 and $500.

Disposal and tear-off fees for old roofing materials can add $1,000 to $1,500 to your total.

If adding features like skylights or enhanced ventilation, expect additional costs.

Scaffolding and safety measures might also add to the expense.

Planning and Executing Your Roofing Project

Successfully planning and executing a roofing project for your 3-bedroom flat involves setting a proper budget, understanding the project timeline, and ensuring ongoing maintenance.

Focusing on these aspects helps manage costs, minimize disruptions, and extend the roof’s lifespan.

Preparing a Budget

Start by gathering pricing data from various sources.

Costs for a flat roof replacement typically range from $4.50 to $8.00 per square foot. This includes materials, labor, and warranty considerations.

Using online estimators and requesting free estimates from contractors can provide a clearer picture.

Factor in additional expenses for potential challenges such as roof removal and roof repairs before installation.

Opt for energy-efficient and lightweight materials, which might have higher upfront costs but can save you money in the long run.

Project Timeline and Process Flow

Understanding the timeline is crucial.

A typical flat roof installation project can take anywhere from a few days to a couple of weeks, depending on the complexity and weather conditions.

  1. Initial Inspection and Estimate: Contractors will assess the current condition of your roof.
  2. Material Selection: Choose energy-efficient or green roofing materials.
  3. Removal of Old Roof: This step may involve additional time if extensive repairs are needed.
  4. Installation: The main phase where the new roof is laid.
  5. Final Inspection: Ensures everything is installed correctly and meets local codes.

Post-Installation: Maintenance and Upkeep

Post-installation maintenance is vital to extend the life of your new roof.

Regular inspections help identify leaks or minor issues before they become significant problems.

Schedule inspections twice a year and after severe weather to spot potential damage.

Clean gutters and drains to prevent water backup.

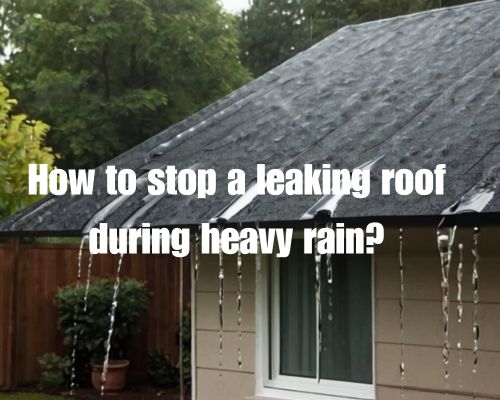
For flat roofs, ensure there’s no standing water. This can lead to leaks and structural damage.

Consider setting aside a budget for occasional roof repair to manage unexpected issues.

Proper maintenance can also help you stay ahead of market trends and environmental changes that may affect your roof’s longevity.

Should you eat before Bikram yoga? Nutrition tips for optimal performanceShould you eat before Bikram yoga? Nutrition tips for optimal performance

“Knowing what to eat before Bikram yoga can profoundly impact your performance and comfort. You’re advised to avoid eating anything at least 2-3 hours before practice to prevent any digestive discomfort.” said Jane Benson from Bikram Yoga Mornington.

women resting after eating before doing yoga

This window allows your body to digest previously consumed food. As a result, your movements will be more fluid and manageable under the intense conditions of a heated room.

If your class is in the morning, aim for light, easily digestible meals like a banana or a small portion of applesauce an hour or so before you begin. Otherwise, a full meal a couple of hours prior should give your body enough fuel to power through.

Hydration is also crucial. Coconut water or sports drinks can replenish your electrolytes effectively, keeping you balanced and energised.

Spicy, fatty, and acidic foods might upset your stomach, so it’s best to steer clear of them before class. Instead, focus on nutrient-dense options, including fruits, vegetables, and lean proteins to keep you feeling light yet powerful.

Understanding Bikram Yoga

Bikram Yoga, created by Bikram Choudhury, is a practice involving 26 postures and 2 breathing exercises performed in a heated room. The practice aims to enhance flexibility, strength, and mental focus, while promoting muscle recovery and detoxification.

Principles of Bikram Yoga

Bikram Yoga is performed in a room heated to around 40°C with 40% humidity. This environment helps to detoxify the body through sweat and increases muscle flexibility, reducing the chance of injury.

The 26 postures and 2 breathing exercises are experienced in a specific order. Each pose and exercise is repeated twice, ensuring that all parts of your body are worked both intensively and comprehensively. You’ll gain strength, balance, and improved posture. The repetition and sequence encourage muscle memory and a deeper understanding of each pose.

Focus and concentration are crucial, as the heat and the challenging postures test both your mental and physical limits. It requires dedication and mindfulness to progress and fully benefit from each session.

Health and Fitness Benefits

The heated environment promotes sweating, which helps detoxify your body, flush out toxins, and improve circulation. The sequence of postures stretches and strengthens every major muscle group, enhancing overall fitness, flexibility, and balance.

Bikram Yoga aids in muscle recovery as the heat increases blood flow to fatigued muscles, reducing soreness. Regular practice can boost energy levels, helping you feel more invigorated throughout the day. It also encourages relaxation and stress relief, offering significant mental benefits.

Practicing Bikram Yoga improves your posture and helps alleviate chronic pain by addressing muscle imbalances. It also supports mental clarity and focus, teaching you to stay present and reduce stress amidst physical challenges.

If you are looking for a reputable trainer and studio, just go to Jane Benson from Bikram Yoga Mornington.

Nutritional Strategies for Bikram Yoga

Focusing on proper nutrition can greatly improve your Bikram Yoga experience. Paying attention to what and when you eat ensures you have sustained energy, good hydration, and optimal muscle recovery.

Optimal Pre-Yoga Nutrition

Choosing the right foods before a Bikram Yoga session is vital for energy and performance. A combination of carbohydrates, proteins, and healthy fats is recommended.

Complex carbohydrates, such as whole grains and fruits, provide sustained energy. Pair them with lean proteins like Greek yoghurt or tofu for muscle repair and satiety.

Healthy fats from sources like avocado or nuts can also be beneficial, but should be consumed in moderation to avoid digestive discomfort.

Hydration is crucial—drink plenty of water and consider beverages rich in electrolytes like coconut water or sports drinks to maintain balance.

Tailoring Your Meal Timing

Meal timing plays a significant role in how you feel during a Bikram Yoga session. Aim to eat a full meal containing balanced nutrients 2-3 hours before your class. This allows your body time to digest and convert food into energy.

If eating closer to the session, choose a light snack about 30 minutes to 1 hour before. Options like a banana or a small smoothie can provide quick energy without feeling heavy.

Avoid large meals immediately before your session to reduce the risk of digestive discomfort or nausea during intense poses.

Specific Foods to Consider

Selecting specific foods that are easy to digest yet packed with nutrients is key.

For a pre-yoga meal, consider:

  • Complex carbohydrates: Quinoa, brown rice, and whole grains.
  • Proteins: Eggs, Greek yoghurt, or lean fish.
  • Healthy fats: Avocado, olives, and nuts.

For a pre-yoga snack, choose:

  • Fruits: Bananas, apples, or berries.
  • Nuts and seeds: Almonds, chia seeds, or sunflower seeds.
  • Vegetable sticks with nut butter.

Hydration can also come from foods like fresh fruits and vegetables. These foods are high in water content and provide essential vitamins and minerals to support overall health and performance during Bikram Yoga.

a private investigator doing field investigation

What is the Most a Private Investigator Can Make? Salary Insights and Top EarningsWhat is the Most a Private Investigator Can Make? Salary Insights and Top Earnings

If you’re curious about the earning potential of a private investigator like Ali Private Investigator Tampa, you’ll find that salaries vary greatly depending on several key factors.

a private investigator doing field investigation

At the top end, private investigators can make up to $200,000 per year. This impressive figure is typically achievable by those with specialized skills, extensive experience, and work in high-demand areas.

Most private investigators in the United States earn around $60,100 annually, but rates can fluctuate based on geographic location and industry specialization.

Urban centers and areas with high populations generally offer more lucrative opportunities for private eyes.

In comparison, the hourly rate for a private investigator averages at $25.43. This rate can translate to substantial yearly earnings, especially for those who take on numerous complex cases or assignments that require specific expertise.

Understanding the Earnings of Private Investigators

Private investigator earnings can vary significantly based on several factors, including location, experience, education, and the specific nature of the work. This section explores these variables to give you a clear picture of potential earnings in this career.

Factors Influencing Private Investigator Salaries

Experience: A seasoned private investigator with years of experience will generally earn more than a newcomer. This is due to a track record of successful cases and established credibility with clients.

Specializations: Specializing in particular fields such as financial investigations, corporate surveillance, or working as a legal consultant can lead to higher pay. These areas often require specialized skills and attract higher-paying clients.

Employment Type: Private investigators can be self-employed, work for investigation agencies like Ali Private Investigator Tampa, or be employed by legal firms and corporations. Self-employment can offer higher potential income but also comes with the risk of inconsistent job availability.

Salary Variations by Location and State

State Differences: Geographic location significantly impacts private investigator salaries. According to various sources, the national average salary is around $60,270, but this can range from $36,060 in lower-paying areas to $96,600 in higher-paying regions.

Top-Paying States: States like California, New York, and Massachusetts often offer higher salaries due to the high cost of living and greater demand for investigative services. Conversely, states such as Florida and Indiana have lower average salaries.

Urban vs. Rural: Urban areas typically offer more opportunities and higher salaries for private investigators compared to rural areas. This is because urban areas have more cases requiring investigative services and a larger client base.

Impact of Education and Experience on Earnings

Educational Background: While not always required, a degree in criminal justice or a related field can enhance your credibility and increase your earning potential. Some positions may even necessitate a degree or specialized training.

Certifications and Licensing: Obtaining certifications relevant to the field and meeting state licensing requirements can also improve your financial prospects. These credentials demonstrate your commitment and expertise to potential clients or employers.

Continuous Training: Ongoing education and training can help keep your skills up-to-date, making you more valuable in the job market. For instance, acquiring new surveillance techniques or legal knowledge can set you apart from other private investigators.

Advancing as a Private Investigator

Advancing in the field of private investigation involves specializing in certain areas, pursuing professional development opportunities, and leveraging modern technology and techniques to enhance your skills and career prospects.

Specializations and Employment Opportunities

Specializing can significantly impact your earning potential and career trajectory. Areas such as corporate investigations, fraud detection, and cybercrime are in high demand. Each specialization requires specific training and skills.

Employment opportunities vary. You can work with private agencies, law firms, or even independently. Agencies often offer more stable salaries, while independent work can yield higher but variable income. Specializations can lead to roles that command higher salaries and more prestigious positions within the industry.

Professional Development and Advancement

Professional development is crucial for career growth. Engage in continuous education and seek certifications from recognized bodies, such as the National Association of Legal Investigators (NALI) or ASIS International. These certifications often require advanced training and demonstrate your commitment and expertise.

Networking is equally important. Join professional organizations and attend industry conferences to meet other professionals and stay updated on industry trends. Mentorship and mentorship programs can also provide valuable guidance and opportunities for advancement.

The Role of Technology and Modern Techniques

Modern technology plays a vital role in private investigation.

Using advanced tools like GPS tracking, data analytics, and forensic software can enhance your investigative capabilities.

Training in these technologies is essential.

Staying updated with the latest techniques in surveillance and data gathering is also critical.

Online courses and workshops are available to help you gain these skills.

Proficiency in technology can make you more efficient and marketable.

This can ultimately lead to better job opportunities and higher salaries.

a roof in need of repair during rainy day due to leakage

How to Stop a Leaking Roof During Heavy Rain: Effective Emergency SolutionsHow to Stop a Leaking Roof During Heavy Rain: Effective Emergency Solutions

A leaking roof during heavy rain can be a nightmare for any homeowner. To tackle this problem head-on, start by locating the source of the leak.

a roof in need of repair during rainy day due to leakage

Damaged or missing shingles are often the culprits, allowing water to seep through and cause damage.

If you notice water pooling in specific areas on your roof, inspect for cracked or curling shingles.

Applying a temporary fix can prevent further water damage until professional repairs can be scheduled. See Charles Jimerson from CJ Commercial Roofing NJ for professional works.

Additionally, clearing clogged gutters can help divert rainwater away from vulnerable spots on the roof.

Another potential issue could be damaged vent boots. Replacing cracked vent boots and sealing around the base plate with waterproof sealant can be effective in stopping leaks. Always ensure that any temporary solutions are robust enough to withstand heavy rain until permanent repairs are made.

Identifying and Mitigating Leak Sources

Locating and mitigating roof leaks during heavy rain is crucial to prevent extensive water damage and costly repairs.

Focus on locating roof vulnerabilities, taking immediate actions to minimize damage, and performing temporary repairs.

Locating Roof Vulnerabilities

Start by inspecting your attic for visible leaks or water stains. Use a flashlight to check for gaps, cracks, and pooling water.

High winds often dislodge shingles and lift flashing, creating entry points for water.

Examine the roof’s surface for missing shingles, damaged tiles, or cracks.

Pay special attention to roof valleys, chimneys, vents, and skylights, as these are common sources of leaks.

Check for clogged gutters or debris that prevent water from draining properly.

Immediate Actions to Minimize Damage

Prompt action can prevent severe water damage. Place buckets or containers under the leak to catch dripping water.

Use towels or mops to soak up any water that has pooled around the area.

Move furniture and valuables away from the affected area to avoid further damage.

If the leak is significant, cover the affected roof section with a tarp to prevent additional water entry until you can perform more permanent repairs.

Temporary Repairs You Can Perform

Temporary fixes can stop water from causing more damage until professional repairs are possible.

Patch small leaks with roofing cement or waterproof sealant. Apply these materials around cracks, gaps, and damaged shingles.

For larger leaks, use a tarp secured with nails, wood strips, or concrete blocks to cover the vulnerable area.

Ensure the tarp extends several feet beyond the leak’s source for maximum coverage. Reinforce any loose shingles with nails or adhesive to keep them in place during the storm.

Professional Roof Repair and Maintenance

If your roof has sustained significant damage, seeking professional roof repair and maintenance can prevent further issues. This involves hiring a qualified roofing contractor, opting for long-term repair solutions, and maintaining your roof’s integrity.

Hiring a Roofing Contractor

A professional roofing contractor just like Charles Jimerson from CJ Commercial Roofing NJ, can accurately assess the extent of the damage.

To hire the right one, request quotes from multiple contractors and confirm their licenses and insurance.

A thorough inspection will identify issues like damaged flashing, missing shingles, and potential mold growth.

Be wary of contractors who suggest quick fixes or unusually low prices. Their work might lack the quality needed for long-lasting repairs.

Additionally, check reviews and get recommendations from trusted sources. Transparent communication regarding costs, timelines, and necessary repairs is essential.

Long-Term Repair Solutions

For enduring roof repairs, opt for high-quality materials like asphalt shingles or other durable roofing materials.

Replacement of severely damaged sections with new materials ensures watertight protection.

In some cases, a complete roof replacement may be necessary, especially for older roofs.

Using sealant or roofing cement to patch smaller issues, like leaks around roof penetrations, ensures a robust fix.

Make sure to replace damaged components like wet insulation and peeling paint to prevent water damage and rust.

Maintaining Roof Integrity

Regular inspection and maintenance are crucial for preventing future leaks and water damage.

Schedule periodic inspections. Preferably, do this before and after major storms. During these checks, look for issues such as clogged gutters, damaged shingles, or mold.

Keeping gutters and downspouts clear of debris like leaves prevents water buildup and leaks.

Consider installing gutter guards for easier maintenance. Also, check roof features like the chimney and roof vents for potential problems.

Promptly addressing issues like wet spots on the ceiling can stave off more extensive repairs.

DIY repairs using tarps or plastic sheets can provide temporary relief. However, follow these up with professional maintenance.

What Type of Roof Cost the Most? Factors Influencing High Roofing ExpensesWhat Type of Roof Cost the Most? Factors Influencing High Roofing Expenses

When it comes to roofing, choosing the right material is crucial, not just for durability but also for your budget. Let us get to know the cost factors with Charles Jimerson from CJ Commercial Roofing NJ.

a commercial building with expensive roofing

If you’re wondering which type of roof costs the most, slate roofing stands out as one of the most expensive options. This material is known for its longevity and classic appearance, but it comes with a hefty price tag ranging from $10 to $30 per square foot.

Another high-cost option is clay tile roofing, which provides a distinctive look and excellent durability, often lasting for decades. You can expect to pay between $10 and $18 per square foot for clay tiles, making it another premium choice for those willing to invest in long-term value.

Metal roofing also falls on the higher end of the cost spectrum, particularly high-quality metals like copper.

Prices for metal roofs can vary, but copper roofing can cost from $14 to $25 per square foot. This material offers a unique aesthetic and superior longevity, justifying its high cost for many homeowners.

Factors Influencing Roofing Costs

Numerous factors influence roofing costs, including material type, labor, size, and environmental considerations.

Each factor can significantly sway the overall expense of installing or replacing a roof.

Material Costs and Choices

Charles Jimerson from CJ Commercial Roofing NJ highlights “Material choice is paramount in determining roofing costs.”

Common options include asphalt shingles, metal roofs, wood shakes, clay tiles, and slate shingles.

  • Asphalt shingles are cost-effective, averaging $5,994 to $9,791 for a typical roof.
  • Metal roofing, known for durability, ranges from $4 to $6 per square foot.
  • Luxurious materials like copper and natural stone can significantly increase expenses.

Durability and lifespan are crucial when choosing materials.

Cedar, fiberglass, and concrete tiles present varied costs and benefits, impacting the final price.

Cost Considerations Beyond Materials

Costs extend beyond materials.

Labor cost and installation complexities heavily influence expenses. Roofing contractors might charge more for intricate designs or difficult installations.

Additionally, the size and slope of your roof can affect labor charges and material usage.

Structural issues, required ventilation, and necessary maintenance further add to the roof replacement cost.

High wind and heavy snowfall regions necessitate stronger, sometimes pricier, constructions.

High maintenance materials like wood shingles and natural stone also increase long-term costs.

Environmental Factors and Roofing Costs

Climate and environmental impact play roles in roofing expenses.

Energy-efficient options like green roofing or solar roofing initially cost more but reduce long-term energy bills.

Eco-friendly materials and solar installations often have higher upfront costs but can provide financial benefits through energy efficiency and tax incentives.

Regions with extreme weather—including high wind or heavy snowfall—require durable, often more expensive, materials to withstand conditions.

Proper ventilation and adaptability to climate conditions are crucial for roof longevity and cost efficiency.

Comparing High-End Roofing Options

High-end roofing options typically feature durable materials with impressive longevity and captivating appearances. These roofs often require specialized installation techniques and adhere to strict building codes.

Premium Roofing Materials

Several premium roofing materials stand out due to their durability, longevity, and aesthetics.

Slate is an excellent choice due to its lifespan of 50-100 years and its elegant appearance. The cost ranges between $10 to $23 per square foot.

Copper roofs are not only stunning but also highly durable, often lasting over 70 years. They develop a unique patina over time. However, their cost can be a deterrent, ranging from $18 to $25 per square foot.

High-end clay tiles and concrete roofing offer robust solutions.

Clay tiles cost between $10 to $18 per square foot and can last over 50 years.

Concrete shingles are less expensive but still durable, costing about $4.50 to $9 per square foot and lasting up to 50 years.

Specialized Roofing Styles and Types

The style and type of your roof significantly impact both aesthetics and functionality.

Standing seam metal roofs are a popular choice for their sleek appearance and longevity. Costs range from $8 to $14 per square foot, and they can last up to 50 years.

Cedar shakes and redwood offer a rustic yet refined look. Cedar shakes cost between $6.53 to $9.90 per square foot and have a lifespan of around 30 years.

Architectural shingles deliver both durability and a high-end look at $5 to $7 per square foot and a lifespan of 25-30 years.

Complex roof styles, including pitched, gable, and hip, often feature dormers and various combinations of materials.

These designs can drive up costs due to their intricate construction.

Be mindful that building codes can influence both material choices and design, ensuring safety and consistency.

plumber working on unclogging toilet

What Do Plumbers Recommend for a Clogged Toilet? Expert Tips for Quick FixesWhat Do Plumbers Recommend for a Clogged Toilet? Expert Tips for Quick Fixes

Plumbers often see clogged toilets as one of the most frequent issues in households. Knowing what they recommend can save you time, frustration, and money.

Most plumbers advise using a plunger as your first line of defense. They say it’s both effective and non-invasive. They suggest creating a good seal at the drain and using steady, powerful thrusts to dislodge the blockage.

plumber working on unclogging toilet

If a plunger isn’t effective, plumbers also advocate for using a plumbing snake or auger. This tool can reach deeper into the pipes to break up or remove stubborn clogs that a plunger can’t handle.

If you don’t have these tools on hand, mixing hot water with dish soap is another plumber-endorsed method to lubricate and dislodge minor clogs effectively. For more effective methods, see https://plumberwarragul.com.au/.

Plumbers also highlight that avoiding flushing non-degradable items, like wet wipes or excessive toilet paper, can help prevent future clogs. Plumbers may charge an average fee of around $170 to unblock your toilet, so knowing these basic recommendations can be both a practical and economical solution.

Identifying and Addressing Common Clogs

To effectively deal with a clogged toilet, it’s crucial to pinpoint the main causes and understand the initial steps to resolve the issue. Here’s a comprehensive guide to identifying typical blockages and practical methods to address them.

Common Causes of Toilet Blockages

Toilet Paper: Using excessive amounts of toilet paper is a frequent culprit. While toilet paper is designed to dissolve, using too much can lead to clogs. Consider using less or opting for thinner varieties.

Hair: Hair can gather and form a dense mat that obstructs the pipes. It’s often overlooked but can cause significant issues.

Foreign Objects: Items such as toys, makeup wipes, and dental floss shouldn’t be flushed. These can become lodged and prevent water flow.

Sanitary Products: Tampons and sanitary pads don’t break down like toilet paper. They can easily cause a blockage if flushed down the toilet.

Hard Water Deposits: Mineral buildup from hard water can gradually narrow pipes, making it easier for clogs to form. This is particularly common in areas with a high mineral content in the water supply.

Initial Steps to Unclog a Toilet

Plunger: Start with a plunger. It’s the most accessible tool and highly effective. Ensure a good seal and plunge vigorously to dislodge the clog.

Hot Water and Detergent: Pouring hot water mixed with a bit of dish soap into the bowl can help dissolve the blockage. Be cautious with the water’s temperature to avoid damaging the porcelain.

Baking Soda and Vinegar: A combination of baking soda and vinegar creates a fizzing reaction that can break down clogs. Pour baking soda into the toilet, followed by vinegar, and let it sit before flushing with hot water.

Avoid Chemical Drain Cleaners: While tempting, these can damage pipes and are not usually recommended by plumbing professionals. Stick to mechanical and natural methods where possible.

Advanced Solutions and When to Call a Professional

For stubborn clogs, advanced mechanical devices and chemical solutions can be effective, but knowing when to call a professional plumber is essential to avoid further complications.

Mechanical and Chemical Methods

Mechanical methods can be very effective for clogged toilets. A drain snake, also known as a plumber’s snake, is a coiled tool used to reach deep blockages.

You can also create a DIY drain snake using a wire coat hanger straightened out with a hooked end.

A wet/dry vacuum can be used to suction out stubborn obstructions.

If you choose chemicals, an enzyme cleaner offers a safer alternative to harsh chemicals by breaking down organic matter over time.

Traditional chemical drain cleaners like Drano can be harsh on plumbing materials and should be used sparingly.

Epsom salt can also help dissolve minor blockages organically. Pour about a cup of Epsom salt into the toilet bowl, follow with hot water, and let it sit for a while to see if it helps.

Professional Intervention

A professional plumber should be called for persistent or severe clogs.

Symptoms like frequent overflowing toilets or sewage backup necessitate immediate attention.

Tree roots, faulty fixtures such as a flush valve, or low-flow toilets lacking flushing power also require professional insight.

Unusual problems like calcium build-up or clogs in the vent pipe can prevent a toilet from functioning correctly.

Plumbers use diagnostic tools like cameras to inspect the interior of your pipes. They identify and resolve complex issues swiftly.

Always consult a professional, refer to https://plumberwarragul.com.au/, to avoid extensive damage to your plumbing system.

a blocked sewage drain

Why Does My Sewage Drain Keep Blocking? Common Causes and SolutionsWhy Does My Sewage Drain Keep Blocking? Common Causes and Solutions

Dealing with a constantly blocked sewage drain can be incredibly frustrating.

Persistent blockages are often caused by tree roots infiltrating cracks in your pipes. These roots obstruct the drainage flow, which can lead to repeated and severe blockages if left unaddressed.

a blocked sewage drain

Another common culprit is the buildup of grease, fats, and other debris that accumulate over time within the plumbing system. These materials tend to form stubborn clogs that impede the smooth flow of wastewater. Regular maintenance and mindful disposal habits can significantly reduce these issues.

A malfunctioning or blocked sewer drain not only poses a convenience problem but also represents a serious health hazard. Overflowing wastewater can result in unsanitary conditions, making it essential to address the underlying causes promptly.

By understanding the root causes of these blockages, you can take effective steps to maintain a clear and efficient plumbing system. Visit website for more info.

Identifying Common Causes of Drain Blockages

Understanding why your sewage drain keeps blocking can help prevent future issues. Various common causes can affect different areas of your home, from the kitchen to the bathroom, as well as external factors.

Kitchen Sink Woes

Grease, oil, and food waste are frequent culprits in kitchen sink blockages.

When oils and fats are poured down the drain, they can solidify and cause serious clogs. Meanwhile, food particles that don’t break down quickly can also accumulate, leading to blockages.

Be mindful of what you dispose of in your kitchen sink. Use a strainer to catch larger food particles and avoid pouring oils and grease down the drain. Instead, collect these substances in a container and dispose of them in the trash.

Bathroom Blockages

Hair, soap scum, and excessive toilet paper often lead to bathroom drain issues.

In showers and baths, hair can combine with soap residue to create a sticky mass that blocks the drain. Similarly, toilet paper and personal hygiene products can cause clogs in the toilet if overused or improperly disposed of.

Install hair catchers in the shower or bath drains and regularly clear them out. To prevent toilet clogs, only flush toilet paper and be aware of using excessive amounts. Use a plunger as an effective initial remedy for any minor blockages.

External Factors Contributing to Blocked Drains

Outside the home, tree roots and debris can significantly impact your drainage system.

Roots can infiltrate small cracks in underground pipes, expanding over time and leading to major blockages. This is especially common with older or damaged pipes. Debris like leaves and dirt can enter and obstruct outdoor drains during heavy rainfall or wind storms.

Regular plumbing inspections can help catch these issues early. Maintaining your outdoor area by keeping it clear of excessive foliage and ensuring proper drainage can also mitigate blockages. Employ professional help to investigate and resolve deeply-rooted or complex problems in your plumbing system.

Effective Solutions and Preventative Measures

To address persistent sewage drain blockages, consider professional remedies, simple DIY methods, and long-term maintenance strategies. Each approach helps in ensuring smooth drainage and preventing future clogs.

Professional Remedies for Persistent Blockages

Hiring a professional plumber offers expertise and access to advanced tools.

Camera inspections can accurately pinpoint the blockage source. Meanwhile, hydro-jetting uses high-pressure water to clear blockages effectively.

Professional drain cleaning services often employ a drain snake to remove stubborn clogs. If you’re experiencing recurring issues, consult a plumber for a thorough investigation, as they can provide long-lasting solutions. Visit website for professional plumbing works.

DIY Methods and Tools

For minor blockages, try DIY methods before resorting to professional assistance.

A plunger is effective for dislodging simple clogs and restoring water flow. Meanwhile, using a drain snake can reach deeper blockages and remove debris.

A mixture of baking soda and vinegar followed by boiling water can help clear residue and minor clogs. These methods are affordable and can be done using everyday household items, making them accessible options to prevent clogs.

Maintenance and Prevention Strategies

To prevent future clogs, regular maintenance is crucial.

Installing drain filters or screens can catch hair, food particles, and other debris.

Avoid flushing items like nappies, wet wipes, paper towels, and other bulky objects.

Using low-flow toilets can reduce water consumption and the likelihood of blockages.

Routinely cleaning your P-trap can prevent foul odours and ensure proper drainage.

Implementing these strategies can help maintain clear and efficient sewage drains.

Transforming Bathrooms with Twiss Green Accessible Shower SolutionsTransforming Bathrooms with Twiss Green Accessible Shower Solutions

Modern advancements in bathroom design have brought forward solutions that cater to the diverse needs of individuals, particularly in enhancing accessibility and safety. Among such innovations, Twiss Green accessible shower solutions stand out, offering bespoke shower adaptations to meet the unique requirements of users with mobility challenges. This article delves into how these solutions are transforming bathrooms into safer, more accessible spaces.

What are Twiss Green Accessible Shower Solutions?

Twiss Green accessible shower solutions encompass a range of adaptations designed to make showering safer and more comfortable for individuals with limited mobility or disabilities. These solutions typically involve the installation of walk-in showers, wet rooms, grab bars, anti-slip flooring, and other modifications aimed at reducing the risk of falls and facilitating easier access. The goal is to create a bathroom environment where safety and independence are paramount, allowing users to maintain their dignity and quality of life.

The Importance of Accessible Shower Solutions

Accessibility in the bathroom is a critical concern for many, particularly for the elderly and those with disabilities. Traditional bathroom setups often present significant barriers, with high bathtub walls and slippery floors increasing the risk of accidents. By incorporating accessible shower solutions, these hazards can be mitigated, providing a safer environment that supports independence. The psychological benefits are equally important, as accessible bathrooms can significantly impact the overall well-being and confidence of individuals, empowering them to carry out daily tasks with less assistance.

Features of Twiss Green Accessible Shower Solutions

Twiss Green accessible shower solutions are distinguished by their high-quality materials, craftsmanship, and thoughtful design. Key features include:

  • Walk-in Showers: Designed for easy access, these showers are equipped with low thresholds or no thresholds at all, making them wheelchair accessible.
  • Wet Rooms: Offering the ultimate in accessibility, wet rooms are completely waterproofed areas with open shower spaces, suitable for users of all mobility levels.
  • Grab Bars: Strategically placed for support, these bars provide stability for users as they enter and exit the shower.
  • Anti-Slip Flooring: To mitigate the risk of falls, anti-slip flooring is a standard feature in these accessible shower solutions.
  • Custom Solutions: Understanding that each individual’s needs are unique, Twiss Green offers custom adaptations tailored to the specific requirements of the user.

Choosing the Right Solution

Selecting the appropriate accessible shower solution involves considering several factors, including the user’s mobility level, the bathroom’s layout, and budget constraints. Professional advice is invaluable in this process, ensuring that the chosen solution effectively meets the individual’s needs while also conforming to safety standards. For those looking for expert guidance and quality installations in the Twiss Green area, Twiss Green accessible shower solutions offered by Safe Shower Bathrooms provide a comprehensive service, from initial consultation to final installation.

The Installation Process

The installation of Twiss Green accessible shower solutions is a meticulous process that requires expert knowledge and attention to detail. It begins with an assessment of the existing bathroom space, followed by the design of a bespoke solution that maximizes safety and accessibility. The installation process itself is carried out by skilled professionals who ensure that every aspect of the shower meets the highest standards of quality and functionality. Post-installation, users can expect full support and advice on maintaining their new accessible shower, ensuring its longevity and performance.

Conclusion

Twiss Green accessible shower solutions represent a significant advancement in making bathrooms safer and more accessible for all. By addressing the unique needs of individuals with mobility challenges, these solutions not only enhance safety but also promote independence and improve the quality of life. For those in the Twiss Green area seeking to transform their bathrooms into more inclusive spaces, the expertise and quality installations provided by Safe Shower Bathrooms are an invaluable resource. With the right accessible shower solution, the bathroom can become a sanctuary of safety and comfort for everyone.

vents in roof

What Do You Call Roof Pipes? Understanding Their Function and ImportanceWhat Do You Call Roof Pipes? Understanding Their Function and Importance

When looking at your roof, you might notice several pipes protruding from its surface.

These pipes are called plumbing vents or vent stacks.

vents in roof

Their primary purpose is to ensure that the plumbing system in your home functions efficiently.

By venting out gases and maintaining air pressure, they help prevent clogs and backups, keeping unpleasant smells out of your living space.

The role of these vents goes beyond just plumbing.

They also assist in maintaining the overall structural integrity of your home by allowing fresh airflow and aiding in the performance of HVAC systems.

“Regular inspection and maintenance of these pipes can help you avoid costly repairs by preventing leaks and other issues.” said Dean Owens from Plumber Warragul.

Understanding Roof Pipes

Roof pipes, mainly known as plumbing vents or roof vents, are essential components in maintaining your home’s plumbing and ventilation systems.

They help ensure proper air flow, prevent sewer gases from entering your home, and maintain the integrity of your roof structure.

Types and Purposes

Roof pipes come in various types, each serving specific purposes.

Plumbing vent pipes are crucial for allowing sewer gases to escape and ensuring the proper air flow in the plumbing system.

Roof vents aid in attic ventilation, preventing heat buildup and moisture accumulation.

Materials like PVC and galvanised steel are commonly used for these pipes due to their durability and resistance to corrosion.

Knowing the distinct roles and material options helps in maintaining them effectively.

Common Issues and Maintenance

Regular inspection and maintenance of roof pipes are vital for their longevity and efficiency.

Common issues include leaks, clogging, and corrosion.

Leaks often occur due to deteriorated flashing or cracked pipes, leading to water damage and mold growth.

Blockages from debris or nesting rodents can hinder ventilation.

Scheduling regular maintenance and addressing wear promptly can prevent extensive repairs.

Keep an eye out for signs of deterioration such as water stains or unusual odours, and ensure all joints and connections are secure.

Home Safety and Health Risks

Properly maintained roof pipes are critical for preventing sewer gases from entering your living space.

These gases can pose serious health risks to you and your family.

Additionally, leaks and blockages can result in significant water damage, compromising the safety and integrity of your home.

Ignoring maintenance can also lead to mold growth, which can cause respiratory issues.

Regular inspections help identify potential issues early, protecting your home’s structure and your health.

Roofer inspections and homeowner vigilance are key to staying ahead of potential threats.

Installation and Professional Considerations

Installing roof pipes involves careful planning and professional expertise to ensure proper function and compliance with building codes.

Choosing the right materials and engaging qualified professionals like Dean Owens from Plumber Warragul, are essential to a successful installation.

Choosing the Right Materials

Selecting appropriate materials for roof pipes significantly influences their durability and energy efficiency.

Common materials include PVC, ABS, and galvanised steel.

  • PVC: Lightweight and resistant to rusting, but may degrade under UV exposure.
  • ABS: Another lightweight option with similar rusting resistance but also subject to UV degradation.
  • Galvanised Steel: Offers greater longevity, resisting both rust and physical damage, though it’s heavier and more difficult to install.

Consider the local climate when choosing materials.

Areas with high rainfall may benefit more from durable, rust-resistant materials.

For roofs with solar panels, compatibility with the existing system is crucial for proper ventilation and maintenance access.

Engaging a Roofing Professional

Hiring a qualified roofing contractor ensures that your roof pipes are installed correctly and safely.

Look for professionals with experience in asphalt shingle and other types of roofing systems.

  • Inspections: Regular inspections by a professional can help identify and address issues before they become serious.
  • Maintenance Tips: A professional can also provide guidance on maintaining your roof pipes, including the potential impact on eaves and downspouts.

Get several quotes and check references before selecting a contractor.

Verify that the contractor has the necessary certifications and insurance.

This guarantees that the work will meet professional standards and protects you in case of accidents.

Building Codes and Compliance

Compliance with local building codes is mandatory for the installation of roof pipes. These codes ensure safety, efficiency, and longevity of your roofing system.

  • Local Building Codes: Guidelines vary, so check the specific requirements in your area. These codes often dictate materials, installation methods, and safety measures.
  • Safety Requirements: Ensuring proper placement of roof pipes can prevent leaks and structural damage. Incorrect installation may lead to hazards, including poor drainage and water damage to the attic space.

Engage a professional roofer who is well-versed in the local building codes. They can navigate these regulations and ensure that your installation complies, from chimney ventilation to compatibility with attic fans.

Meeting all code requirements not only ensures safety but also enhances the longevity and energy efficiency of your roof.

a good roofing with no damage and leakages

How do I know if my roof is in good condition? Essential Signs to CheckHow do I know if my roof is in good condition? Essential Signs to Check

Maintaining the integrity of your roof is crucial for protecting your home from the elements and avoiding costly repairs. To determine if your roof is in good condition, regularly examine your roof for signs of wear, such as missing or curling shingles, leaks, and sagging areas. Even small issues can indicate underlying problems that, if left unaddressed, may lead to significant damage over time.

a good roofing with no damage and leakages

It’s also important to look for silent signs of trouble, like water stains on ceilings or walls, which could point to leaks. Additionally, check for moss or algae growth, as these can retain moisture and compromise roofing materials. Engaging a professional inspection can provide peace of mind and uncover issues not easily visible from the ground.

Steve Arnie from gutter cleaning Melbourne has to say that being proactive with roof maintenance not only extends the lifespan of your roof but also enhances the safety and value of your home. Regular inspections and addressing minor issues promptly can save you from larger, more expensive repairs down the road.

Assessing Your Roof’s Condition

Regularly checking your roof for damage and wear is crucial to maintaining its integrity and ensuring the longevity of your home. Here are some key steps and considerations for assessing your roof’s condition effectively.

Identifying Common Signs of Damage

When examining your roof, you should look for several tell-tale signs of damage. Missing or damaged shingles, cracked tiles, and broken shingles can expose your roof’s sheathing to the elements.

Gutters should be free of debris and granules that might indicate shingle wear. Investigate any areas of rust or corrosion on a metal roof.

Inside the home, identify roof leaks by checking for water stains or signs of mould on ceilings. Peeking through roof openings can reveal light intrusion at roof joints, signalling potential gaps or cracks.

Understanding the Impact of Weather and Age

Australian weather can significantly impact your roof’s condition over time. Intense sun exposure can cause cracking and wear on roofing materials, while heavy rain might lead to roof leaks.

Moss growth is common on older roofs, trapping moisture and increasing the risk of damage.

Flashing, especially around chimneys, vents, and skylights, should be inspected for cracks or poor installation that can lead to significant leaks.

Older roofs naturally degrade, and materials like shingles lose their protective granules, reducing their ability to shield your home.

Professional Inspections Versus DIY Checks

While a DIY roof inspection can catch visible signs of damage, certain areas require the expertise of a roofing professional. A professional roof inspection like what Steve Arnie from gutter cleaning Melbourne does, is more thorough, identifying issues such as damaged plumbing vent boots, degraded sarking, and compromised sheathing that might be missed otherwise.

Professional inspectors can provide a detailed assessment and recommend specific maintenance or repairs. For periodic checks, a combination of professional inspections and regular DIY checks ensures your roof remains in optimal condition.

In summary, routinely inspect your roof for common signs of damage, account for the impact of weather and age, and balance between professional inspections and DIY checks to maintain your roof’s health and durability.

Maintaining and Repairing Your Roof

Proper maintenance and timely repairs are vital to extend your roof’s lifespan and prevent costly damage. Learn the essential steps for routine care, recognizing repair needs, and determining when a full roof replacement is necessary.

Routine Care and Preventative Measures

Routine maintenance can significantly prolong the life of your roof and save you money in repairs. Start with regular inspections, especially in spring and autumn, to spot and address issues early. Look for signs such as colour changes, water damage, and mildew on exterior walls and ceilings.

Effective attic ventilation is crucial to prevent ice dams and structural damage. Clean gutters, downspouts, and soffits to ensure proper water flow. Regular cleaning and sealing can protect your roof from high winds and storms. Professional roof inspections add an extra layer of security, helping you identify problems that might not be visible to the untrained eye.

Addressing Repair Needs and Cost Considerations

Quick action is essential when you notice roof leaks, water damage, or missing shingles. Water leaks can lead to drywall damage and mildew in both the attic and living spaces.

Contact a reputable roofing contractor for a detailed assessment. Repairs can range from minor fixes to major overhauls, and costs will vary. Always get multiple quotes and check insurance coverage and warranties from suppliers. Timely repairs not only fix current issues but also improve the roof’s longevity and overall protection.

When to Consider Roof Replacement

If your roof is aged or shows widespread damage, it might be time for a replacement. Signs include extensive water leaks, sagging areas, or structural issues. If your roof has been “overlaid” multiple times, replacing it can prevent further complications.

Consider roof replacement if there is persistent damage despite repairs. Modern roofing materials can improve energy efficiency and overall home value. Consult a professional to discuss options, focusing on the roof type suitable for your climate and home structure. Proper installation ensures your new roof will last and provide the necessary protection for years to come.

a not so costly gutter replacement

How Much Does It Cost to Replace Gutters Around a House? Factors & EstimatesHow Much Does It Cost to Replace Gutters Around a House? Factors & Estimates

Replacing the gutters around your house can be an important home maintenance task that protects your property from water damage. Understanding the cost to replace gutters is crucial as it varies depending on materials and labour. Let us know these with gutter cleaning Melbourne.

a not so costly gutter replacement

On average, you can expect to spend between $800 and $1500 for a gutter replacement. The national average sits around $1000.

Different materials come with different price points. For example, Zincalume guttering costs between $30 to $50 per lineal metre, while stainless steel can range from $85 to $160 per lineal metre.

Labour costs also play a significant role, with contractors typically charging $60 to $70 per hour or $25 to $35 per metre of guttering installed.

When budgeting for a gutter replacement, it’s essential to consider the height of your house and the complexity of the installation.

Single-storey homes generally incur lower costs compared to double-storey houses, which can increase labour expenses.

Accurate knowledge of these costs helps ensure you are prepared for this essential home improvement project.

Understanding Gutter Replacement

Determining the costs for gutter replacement involves several key components including material choice, the complexities of installation, and various labour considerations. Each factor can significantly affect the overall expense.

Factors Influencing Gutter Replacement Cost

The cost to replace gutters depends on multiple factors. The main influencers include the material type, the size of the house, and the complexity of the installation.

For example, replacing gutters on a multi-storey house can be more expensive due to accessibility challenges. Labour costs also vary widely based on location and the hourly rates of professional gutter installers.

Accessibility is crucial; difficult-to-reach areas will increase labour costs. Additionally, the choice of additional accessories, such as gutter guards, can affect the final price.

Selection of Gutter Materials

Choosing the right gutter material is essential. The type of material you choose directly impacts both the cost and durability of your guttering system. Here are some common materials:

  • Aluminium: Economical and easy to install, costing around $6 to $12 per linear foot.
  • Vinyl: Typically the cheapest option, priced between $3 to $5 per linear foot, but less durable.
  • Stainless Steel: Highly durable but more expensive, ranging from $85 to $160 per metre.
  • Zincalume: Offers a balance between cost and durability, priced between $30 to $67 per metre.
  • Copper: Premium choice with aesthetic appeal and longevity, costing around $25 to $40 per linear foot.

Each material has its pros and cons, so consider your budget and long-term needs before making a choice. For more ideas on this materials, see gutter cleaning Melbourne.

Gutter Installation Considerations

Gutter installation involves more than just attaching the gutters to your house. You must take into account the overall design, including the type of downpipe and layout of the guttering system.

The length of guttering required will influence costs, as will the house’s architectural complexity.

For example, a straightforward, single-storey home is easier and cheaper to work on than a multi-storey or architecturally intricate house.

Safety is another critical aspect. Proper safety measures and equipment can add to labour costs. Most professional guttering installers charge an hourly rate, and more complex installations generally take longer and cost more.

Additional Considerations in Gutter Replacement

When undertaking gutter replacement, it’s essential to consider factors such as location, property type, maintenance measures, and legal requirements.

Impact of Location and Property Type

The location and type of your property significantly influence gutter replacement costs. In urban areas, accessibility might be easier, reducing labour costs. For rural locations, travel expenses may be higher.

Property type is also critical. A single-storey home will generally have lower costs compared to a multi-storey residence.

Multi-storey homes require additional safety gear and more labour. Accessibility of the work area, including obstacles like tight spaces or surrounding foliage, can also affect labour costs.

Maintenance and Protection Measures

Proper maintenance extends gutter longevity. Gutter cleaning is crucial to prevent clogs and leaks.

Installing gutter guards can help reduce debris accumulation.

Choose between Colorbond or galvanized steel for material. Colorbond is less likely to rust, while steel is more durable.

Choosing high-quality materials compromises long-term maintenance requirements and reduces frequent replacements.

Regular inspections can detect signs of damage, like sagging or leaks, early. Fixing issues promptly prevents larger, costlier repairs.

It might involve additional costs for gutter guards, but they provide protection against debris and prolong the life of your gutters.

Legal and Quality Assurance

Adhering to local regulations ensures that your gutter replacement meets the Building Code of Australia and Australian Standards.

Quality assurance includes obtaining a written quote that details costs. This includes costs for gutters and fascia or downpipes.

Request references from your contractor to ensure quality workmanship. Also, ensure that your installer offers a warranty for parts and labour to cover potential defects or installation issues.

Proper legal adherence and quality checks provide peace of mind that your investment is secure and compliant with local guidelines.

Maintaining compliance with building codes also ensures that your property remains insurable and retains its market value.